![]()
Site Aliasing
If your site supports the multi-site feature, you can enter aliases for any site. For example, your company’s name just changed from Bionics to NewGen. You can use the site aliasing feature to resolve the url www.bionics.com to www.newgen.com.
Note: If your Ektron CMS400.NET supports multi-site configurations, an automatic alias assigned to a taxonomy will apply to content in all sites. This is because taxonomy is site independent.
Warning! If the site being aliased resides in a folder under your server’s Web root folder (for example, ser4325/min), you must add the subfolder to the alias. So, to continue the above example, you could not enter http://www. myalias.com as an alias for that site. Instead, you would enter http://www.myalias.com/min/.
Creating Site Aliases
Enabling site aliasing has two steps.
Setting up a Site Alias in the Ektron CMS400.NET Workarea
Add each site alias as an IIS host. To learn how do this for your server, please consult IIS help.
Setting up a Site Alias in the Ektron CMS400.NET Workarea
To set up site aliases, follow these steps.
Note: You cannot assign a site alias to the site root folder. 
1. Open the site folder for which you want to create aliases. (Site folders have a globe icon, like this:  ).
).
2. Click View > Properties.
3. Click Edit ( ).
).
4. Click the Site Alias tab.
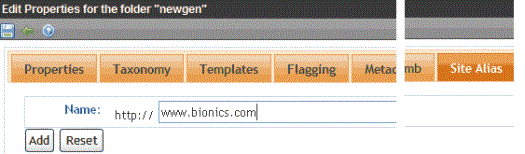
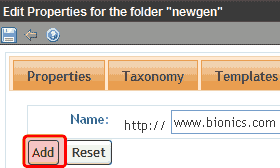
5. Enter the alias into the Alias Name field.
Note: The alias cannot end with a slash (/).
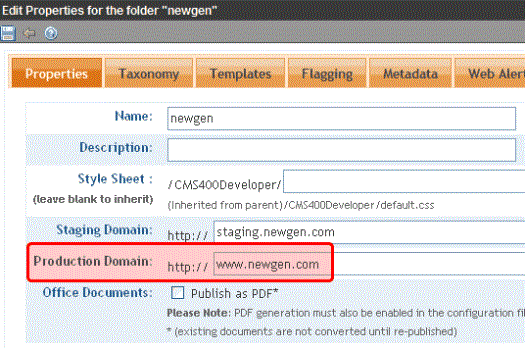
From now on, if a site visitor enters the alias into a browser address field, he is redirected to the site URL (set on the folder properties tab’s Production Domain field).
Editing a Site Alias
Follow these steps to edit a site alias.
1. Open the site folder for which you want to create aliases. (Site folders have an icon, like this: ).
2. Click View > Properties.
3. Click Edit ().
4. Click the Site Alias tab.
5. From the Alias list, click the alias that you want to edit. When you do, it is highlighted in yellow and appears in the Alias Name field.
6. Change the alias text.
7. Click Save, directly below the Alias Name field.
8. Click Save ( ).
).
Deleting a Site Alias
Follow these steps to delete a site alias.
1. Open the site folder for which you want to create aliases. (Site folders have a globe icon, like this: ).
2. Click View > Properties.
3. Click Edit ().
4. Click the Site Alias tab.
5. From the Alias list, click the alias that you want to delete. When you do, it is highlighted in yellow and appears in the Alias Name field.
6. Click Delete ( ).
).
7. The alias is deleted.


![]()